Creating Hosts
The complete reference for connection configuration
A "Host" in Netcatty is the atomic unit of your workflow. It's not just an IP address; it's a preserved configuration state including port forwarding, appearance settings, and automation rules.
This guide details every field in the Host Configuration dialog.
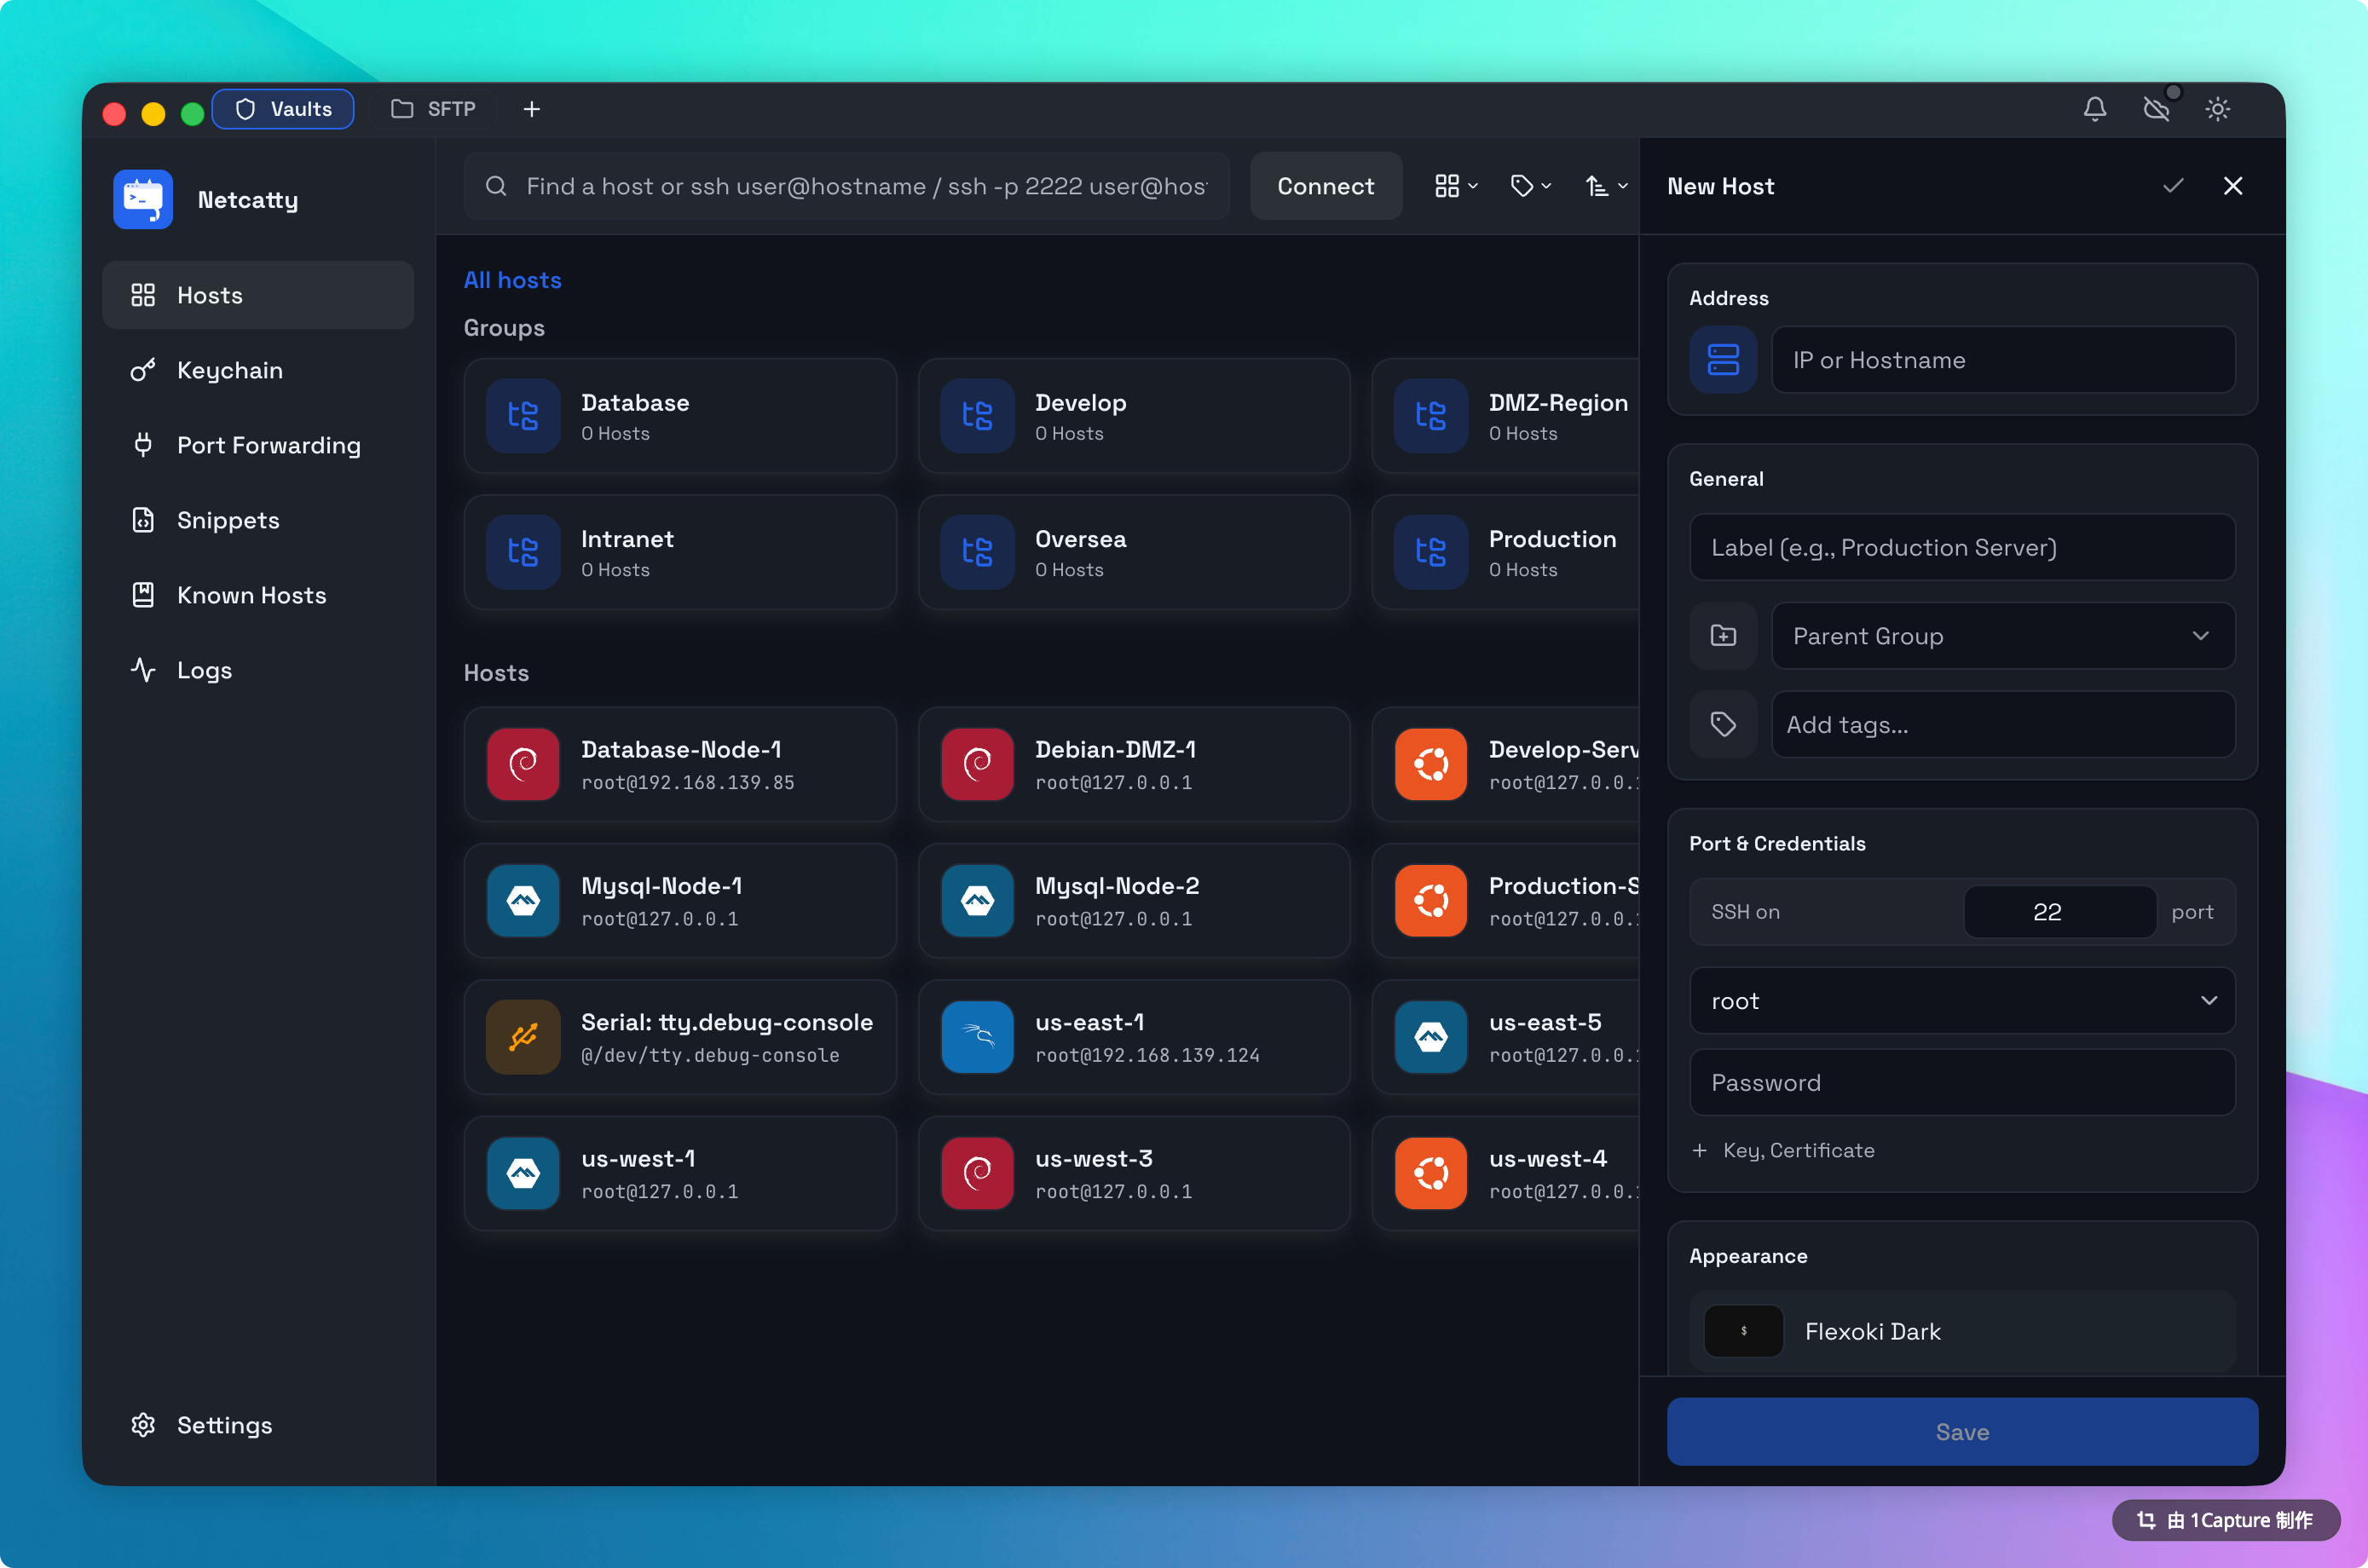
The Connection Editor
To create a host, you can:
- Click the + button in the sidebar header.
- Right-click a folder -> New Host.
1. General Tab (The Essentials)
This tab covers 90% of use cases.
- Label (Display Name):
- This is how the host appears in your Vault and Tabs.
- Tip: You can use emoji!
🔥 Prod DBis a valid name.
- Address (Hostname/IP):
- Supports IPv4 (
192.168.1.1), IPv6 ([2001:db8::1]), and FQDN (api.corp.com). - Validation: Netcatty performs basic DNS resolution validation in the UI to warn you of typos.
- Supports IPv4 (
- Port: Default
22. Note that if you use a jump host, this is the port of the final destination, not the bastion. - Username: The user to log in as (e.g.,
root,ubuntu). - Authentication Mode:
- Password: Stored securely in your OS Keychain.
- Identity (Recommended): Selects a reusable Identity (User + Key) from the Global Keychain.
- Private Key (Keychain): Select a specific SSH key already imported into your Keychain.
2. Advanced Tab
For power users needing specific networking tweaks.
- Startup Command:
- A script to run immediately after login.
- Example:
cd /var/www/html && exec zsh(This drops you directly into your project folder).
- Environment Variables:
- Injects
LC_or standard variables into the SSH session. - Usage:
NODE_ENV=production.
- Injects
- Jump Host:
- Select a Bastion host to tunnel through. See the Jump Host Guide for details.
3. Terminal Tab (Per-Host Overrides)
You generally set your theme globally, but you can override it per-host.
- Theme: Force your "Production" servers to use a Red background theme to prevent mistakes.
- Cursor Style: Block vs Bar.
- Font Size: Useful for presentation/demo machines (bump to 18px).
Bulk Creation & Migration
Manually clicking "New Host" multiple times is inefficient. Netcatty offers robust migration tools.
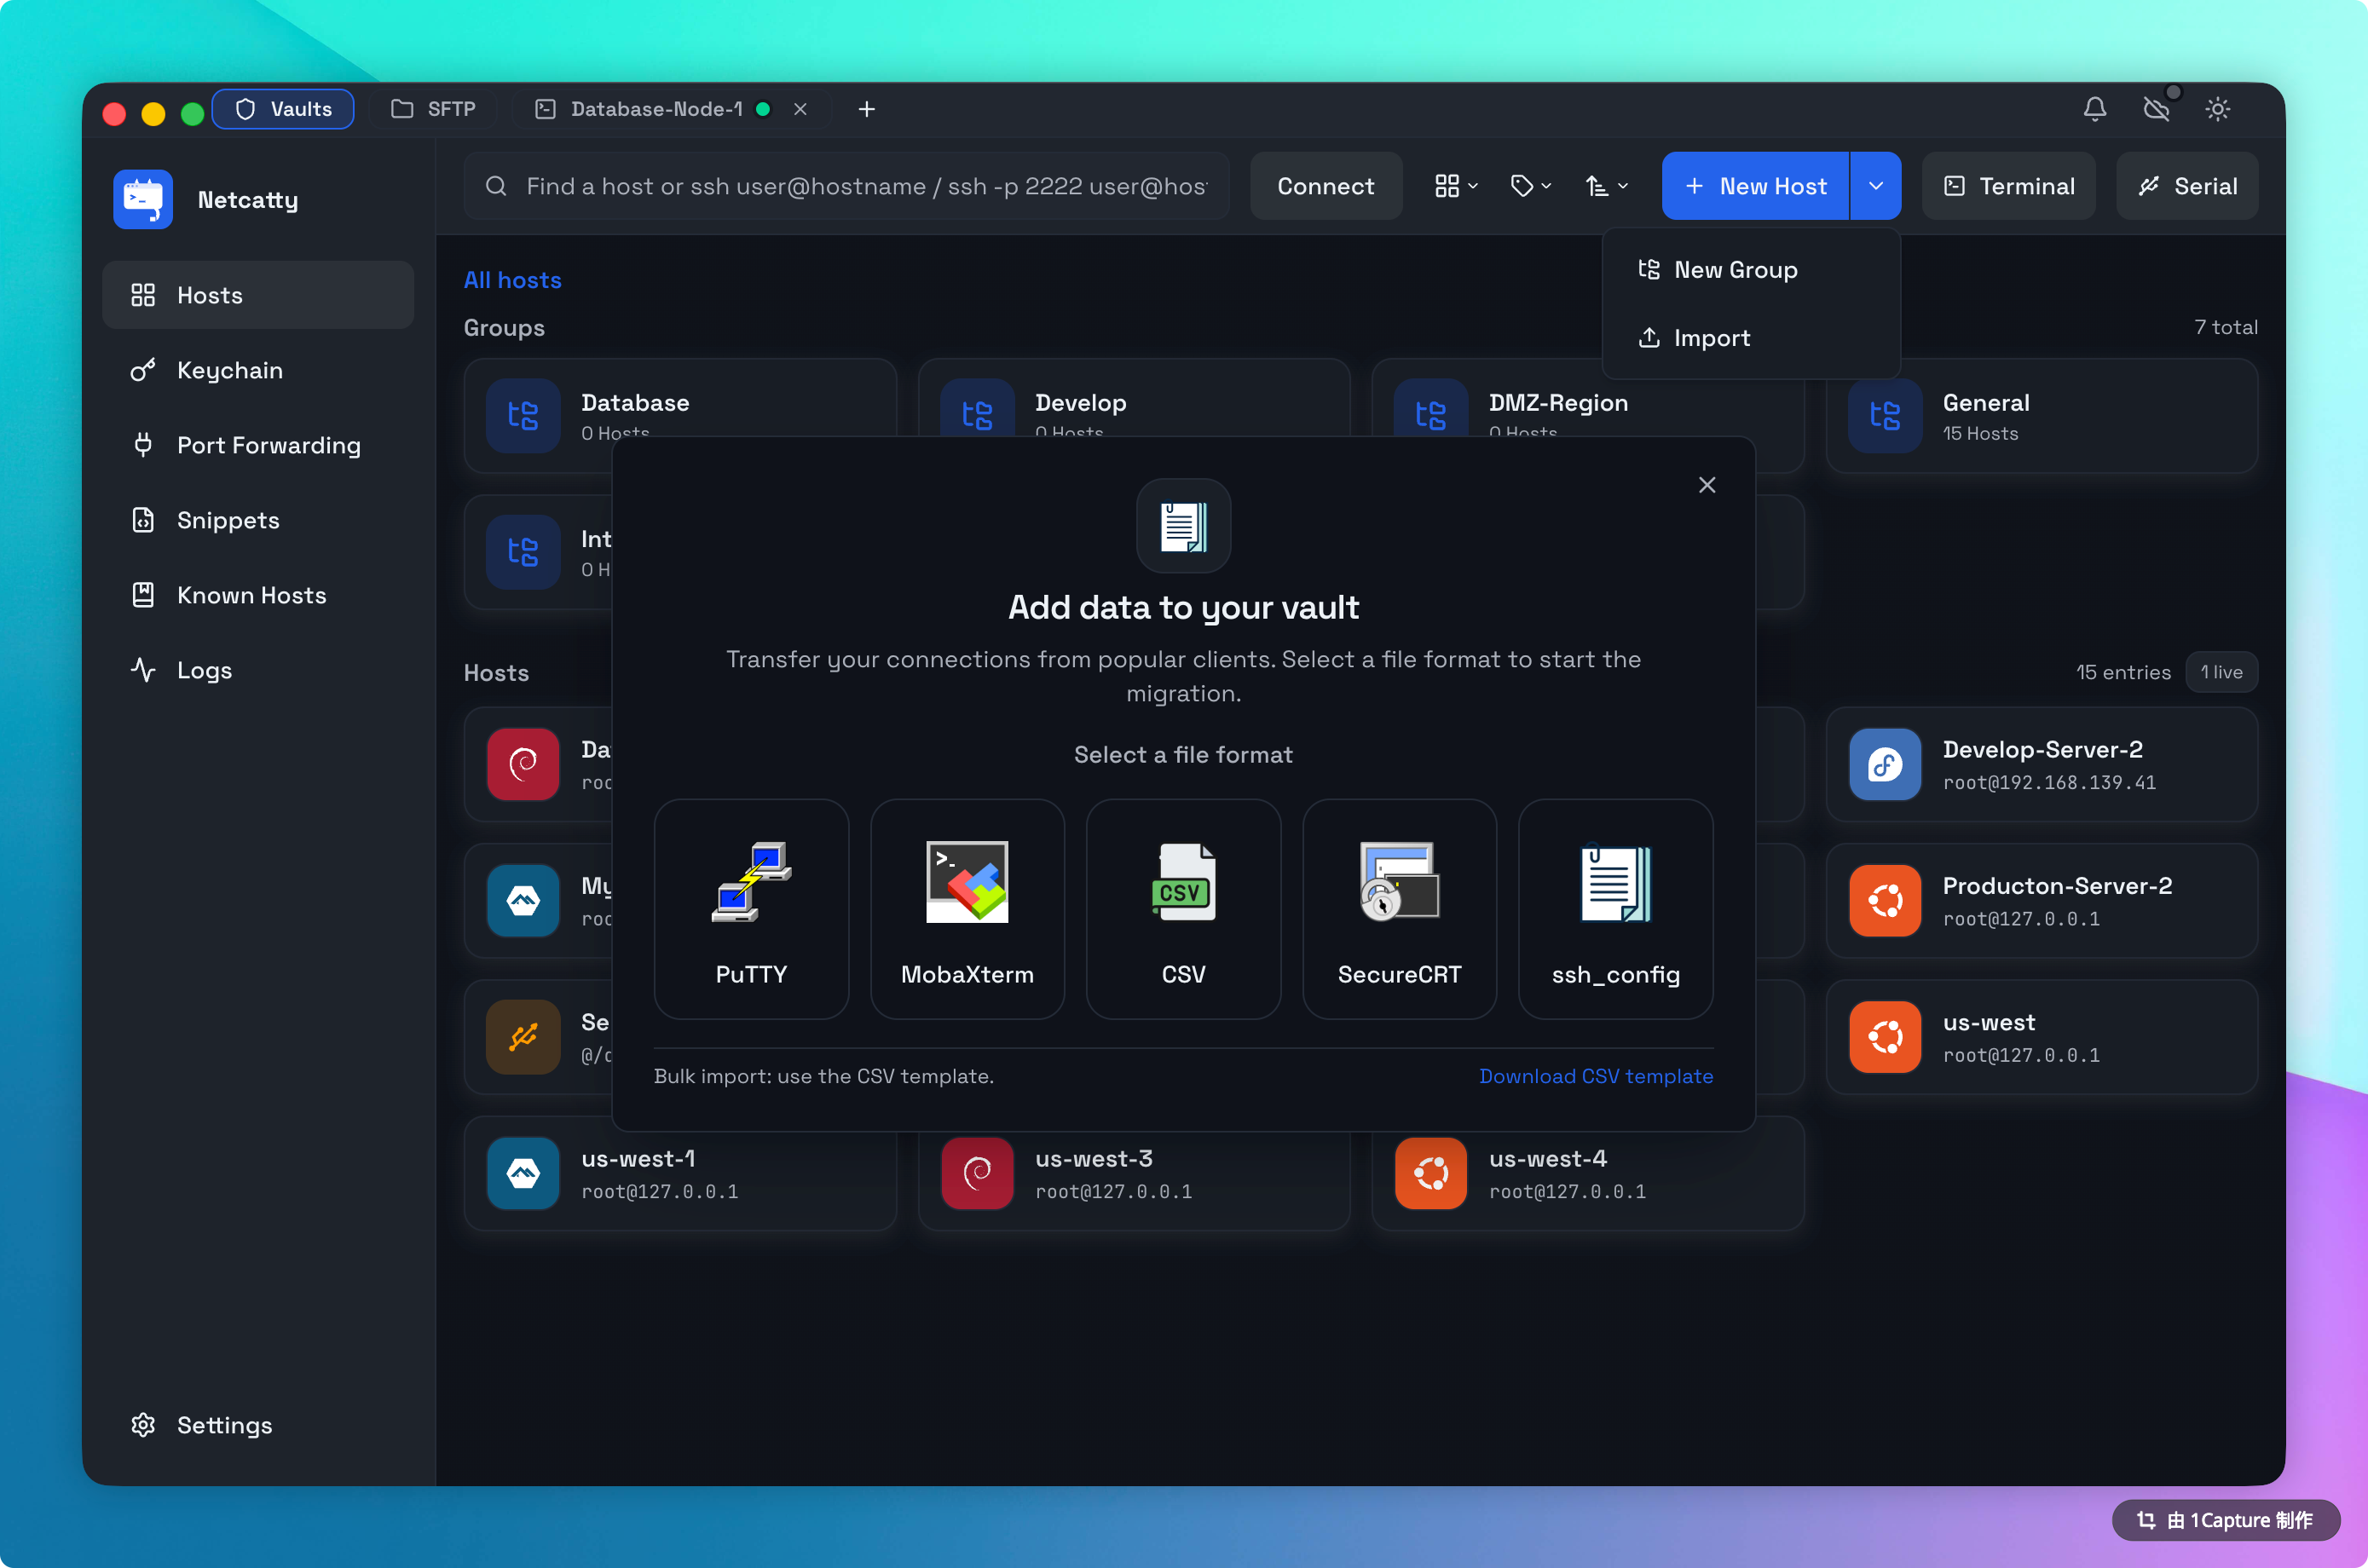
Method 1: Vault Import
Transitioning to Netcatty is seamless. We support importing your existing host lists from:
- SSH Config: (
~/.ssh/config) - PuTTY: Registry
.regexports. - MobaXterm:
.iniConfiguration exports. - SecureCRT: Session configuration files.
- CSV: Use our generic template for bulk migration.
To import:
- Open the Vault.
- Click the Import button in the header.
- Choose your format and select your file.
Method 2: Smart Connect
Type user@hostname directly into the search bar and press Enter to launch the connection wizard instantly.
URL Scheme Support
You can launch Netcatty from other apps (like Notion or Slack) using the ssh:// protocol.
- Format:
ssh://user@hostname:port - Behavior: Netcatty will intercept this link, check if a matching host exists in your Vault (to use its saved key), and connect. If no host exists, it creates a temporary "Quick Connect" session.